![]()
Assembling the Cases
TRT Home Page Disassembly
Through Ignition Disassembly Through
Transmission
Installing 3rd Gear Assemble
Clutch
 |
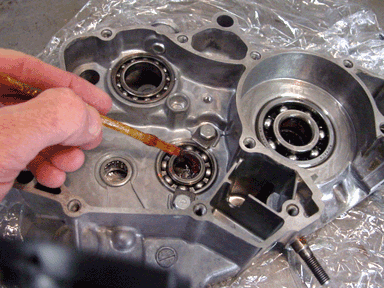 |
| Clean the cases first in a parts tank or use a can of carb spray and a kitty litter tray. Next fill your sink with hot water and a cup of Tide. Clean the cases again. Warning, the hot water may cause one or more of your bearings to fall out. Never fear, rinse and dry the cases, locally heat the bearing races and re-insert the bearing. Make sure all steel pieces have a light coating of WD40 to prevent rust. I wrap the cases in Saran Wrap to keep the dust out of the bearing until I reassemble the unit. | When assembly time comes, lube all the bearings with motor oil and grease the inside of the bearing where a shaft will be inserted. |
 |
 |
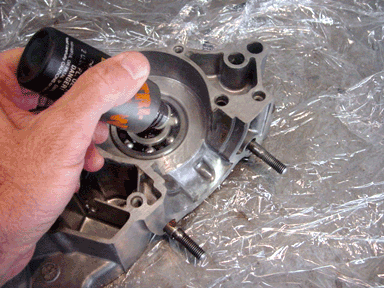
| Lube the main bearings with castor or motor oil. | Grease the main bearing seals. It is good insurance against air leaks to replace these inexpensive seals at this point in the procedure. |
 |
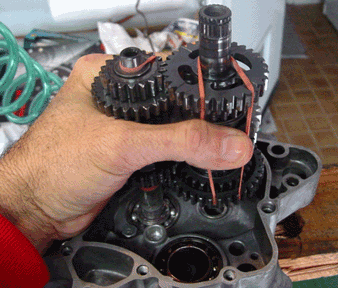 |
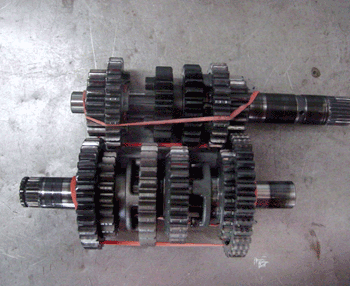
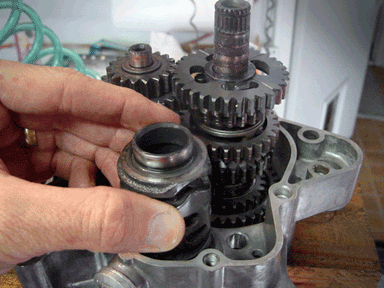
| Mate your transmission shafts together on the bench. | As a unit, place the mated transmission shafts into the clutch side of the cases. |
 |
 |
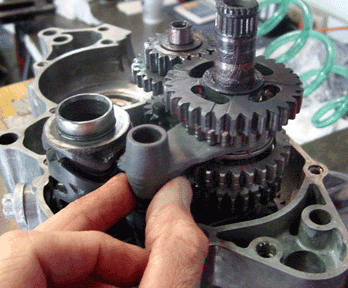
| Remove the TRT Transmission Shaft Retaining Tool ($29.95 each). | Install the shift drum into the clutch side of the cases. |
 |
|
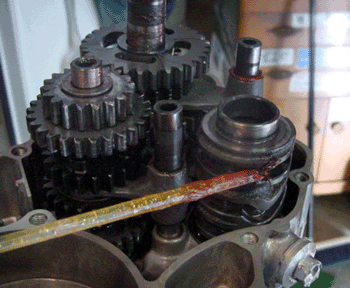
| Grease the raceways in the shift drum. Ignore the shift forks and shafts in place. We are coming to that. | Grease the shift forks. Concentrate on the fork, the hole for the shaft and the raceway knob. |
 |
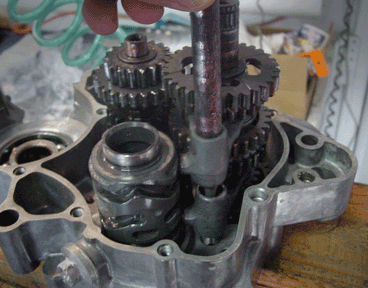 |
| You are entering the tricky zone. Locate the shift fork that has an R stamped onto it. With the R pointed down, locate the fork on the rear transmission shaft. Use the lower fork land on the transmission shaft. Insert the fork with the L stamped on it on the upper fork land on the rear transmission shaft. The L is also pointed down. Move to the forward facing transmission shaft(nearest to crank) Find the shift fork with the C stamped onto it. Insert the fork with the C facing down into the fork land on the transmission shaft. | Install the shifter fork shafts. Short one nearest the crank, long one, with the machined end down, furthest away. Notice the grease on the shafts. At this point, the transmission should be functional. Turn the shift drum and twirl the shafts and watch all the little pieces dance around. |
 |
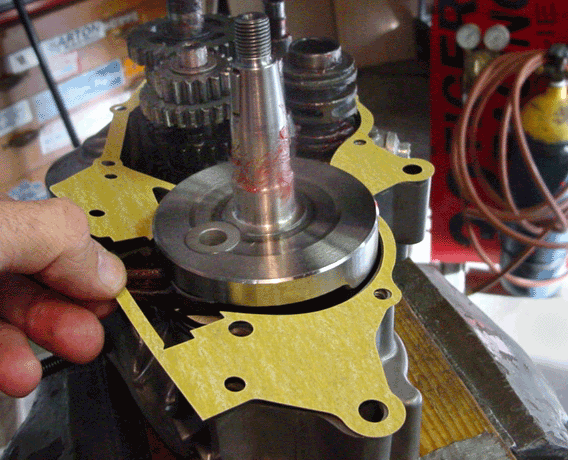 |
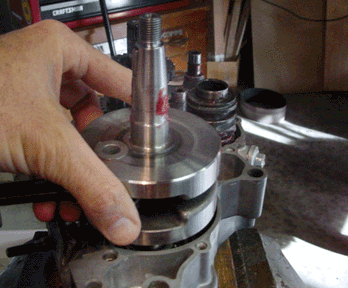
| Let's talk about the crank. I relieve the journals on my cranks about .0006-8. This allows a nice slip fit into the main bearing. If you don't have your crank relieved, you will have to get a Kawasaki Crank Saver and a Honda Crank Tool to close up the cases. E Mail me for further details about relieving the crank. | Install Honda's excellent and expensive case gasket. Note the grease on the crank half. |
 |
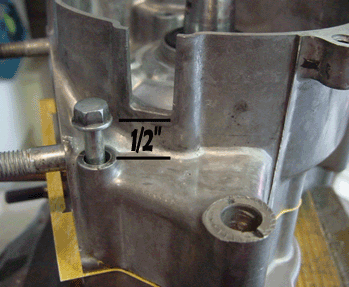 |
| Gently lower the ignition side case over the assemble lower case. Make sure you have the vent tube installed. If you have your crank relieved, the cases will mate nicely. If not, get out the crank and case tool and get busy. | Welcome to the find the correct case bolt game. Grab all the bolts (9 I think...) and start dropping them into the holes. You want about a 1/2" of bolt sticking up from the hole before you start tightening. Tighten the bolts to 65 inch pounds. Check now to see if the crank and tranny shafts spin somewhat freely. |