![]()
Installing 3rd Gear
TRT Home Page Disassembly
Through Ignition Disassembly Through
Transmission
Assemble the Cases Assemble
Clutch
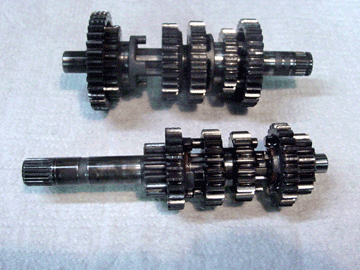
| Well, this is what we came here for. Count the pieces. I get 26. Every one VERY IMPORTANT. In Watkins terminology, the gear shaft in the foreground is the short shaft and the gear shaft in the background is the long shaft. Call them anything you like, just pay attention to their orientation. | |
| This is scanned from my engine notebook and I can't urge you enough to make one of these yourself. This is my notes sheet. I disassembled and measured EVERYTHING, making careful notes on how the parts looked and were oriented on the shafts. You MUST do this. | |
 |
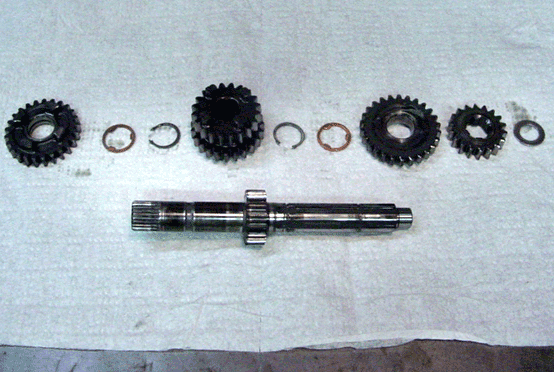 |
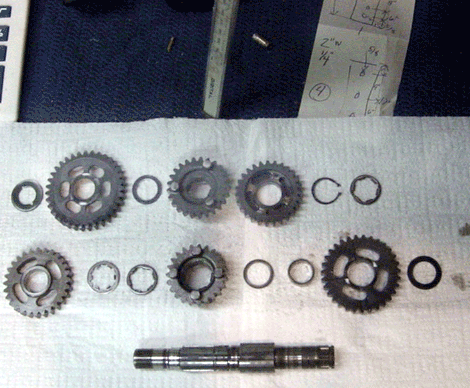
| Take a good look and take careful notes. I time to tear it apart! Note the dark gray color. I had this transmission coated by Polymer Dynamics in Houston. These guys did great work and were very fast. Please email me if you consider doing this. I have a couple of warnings for you to consider. | One of the more important aspects of the transmission is the orientation of the circlips. There is a round side and a sharp edge side. Note how the clip comes off the shaft. Put it on wrong and the tranny will lock in 3rd or 4th gear. It is also not a bad idea to put in new clips. These can be obtained easily from Honda of Troy's website. |
 |
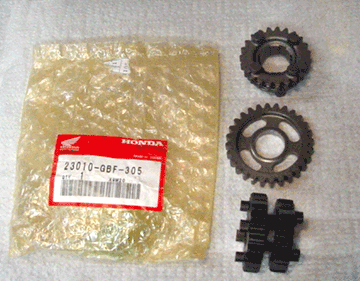 |
| This is the fun shaft(long shaft). Why is this the fun one? On top of getting circlip orientation correct, you have to get the flanged retainer washer and its mate installed correctly. | This is Honda's upgraded 3rd gear set. (Please note Planet Honda parts department-this is what is supposed to come when you order this part number....) The cost is around $40. The perpetrator in 99% of the broken trannys in K1 is the middle gear. Note how thin the material is between the dog runs and the gear teeth. 25 horsepower passes through this area. An even better idea would be to buy Powersource's billet third gear. ABSOLUTELY impossible to destroy. |
 |
 |
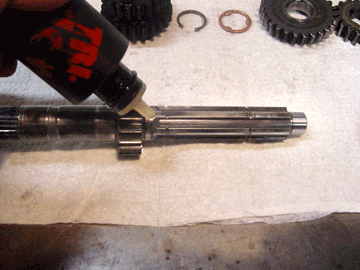
| Lube the tranny shaft with TRT NASA spec transmission lubricant or 30wt. engine oil. | Before you start assembling the transmission, replace the three third gear pieces with the new ones. Take the old gears and toss them in the tackle box. |
 |
 |
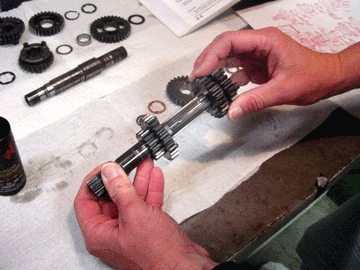
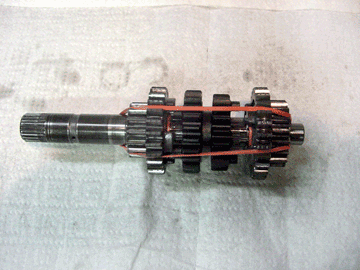
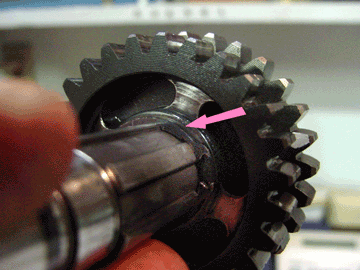
| When your short shaft is assembled, now the worrying starts. Did I put all those little pieces back together correctly? Are my circlips oriented so that the sharp edge faces the direction of gear thrust? Will my wife see the VISA card bill? The rubber band (TRT transmission agregator-part number 5412a $29.95) is very useful in holding the parts together on assembly. | Assembling the long shaft correctly is a little more challenging. Pay very close attention to the notes you took and the owners manual. This is the trickiest part. This two part retainer must be correctly installed. Female washer first, then the male washer, tangs facing in. |
 |
 |
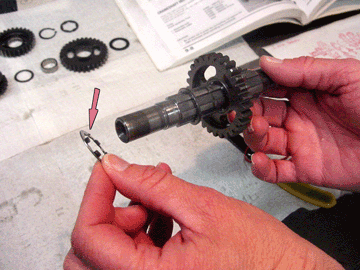
| The final tricky manuever is installing the indexed circlip. Make sure the tang lives in the groove on the shaft. Get the circlip orienttion wrong, you get to come home from the track early. | Here is the assembled long shaft with the reasonably priced TRT transmission agregator. Breathe a sign of relief, get someone to pat you on the back. You have done your first transmission. Was it good for you too? |